Tuesday, July 29, 2014

Favorites under $10

 I am a day late, but I am linking up with Andrea and Erika with some of my favorite things under $10.


These colorblock knit shorts are super cute for lounging around the house. Only $5.18!
Target


I love headwraps and this one is no exception! Only $2.99!
Forever21


I am really loving this girly lightweight scarf!
Forever21


I love this crossbrody fringe bag! And only at $9.98, what a steal?
Target


Or this target fringe bag is only $8.74, how fun!
Target


Friday, July 25, 2014

Friday Favorites!

Today I am linking up with AndreaEricka and Narci for their series, Friday Favorites!
It's my first time and I am kind of loving this idea.


Momfessionals

Since I am so ready for fall and Christmas, I will start with my favorite Christmas in July Project. This is seriously such an easy project that makes me think, well duh, why didn't i think of that!


Favorite Bathroom: White and gold and flowers and bird prints and that circular light. Come to my house! I want to take a nice long bath in that claw-foot tub peeking out at me.


Favorite Kitchen: I just love the pops of color on this white kitchen. And those cabinets that extend all the way up with that chunky crown molding!!!!


Favorite Home Office: This is such a fun office. Rustic chic with pops of vibrant colors! LOVE


Favorite Playroom: Trey would have SOOO much fun in a playroom like this!


What are some of your favorite things right now?

Monday, July 21, 2014

How to Paint Stripes on Textured Walls

Another room painted! Ahh it feels good to say type that. We sure do go through spurts of laying off the house projects, but we are back! We just painted our front entry way and we are so happy with the results. I am the type of person that will literally sit on something FOREVER because I am scared I will screw it up, so this was a big one. We not only painted the entry, but we painted STRIPES. And they look pretty dang good for first timers. I will do a little tutorial of what we did and how it worked for us, but for a more complete AWESOME tutorial check out Little House of Four's tutorial or Dimples and Tangles tutorial. I followed both of their tutorials and got really good results. I bet you won't be able to leave their blogs quickly... They both have amazing style!


First Step: Paint your wall with your main color. We painted our entire entryway Ultra White by Valspar and let that dry overnight.


Second Step: MEASURE

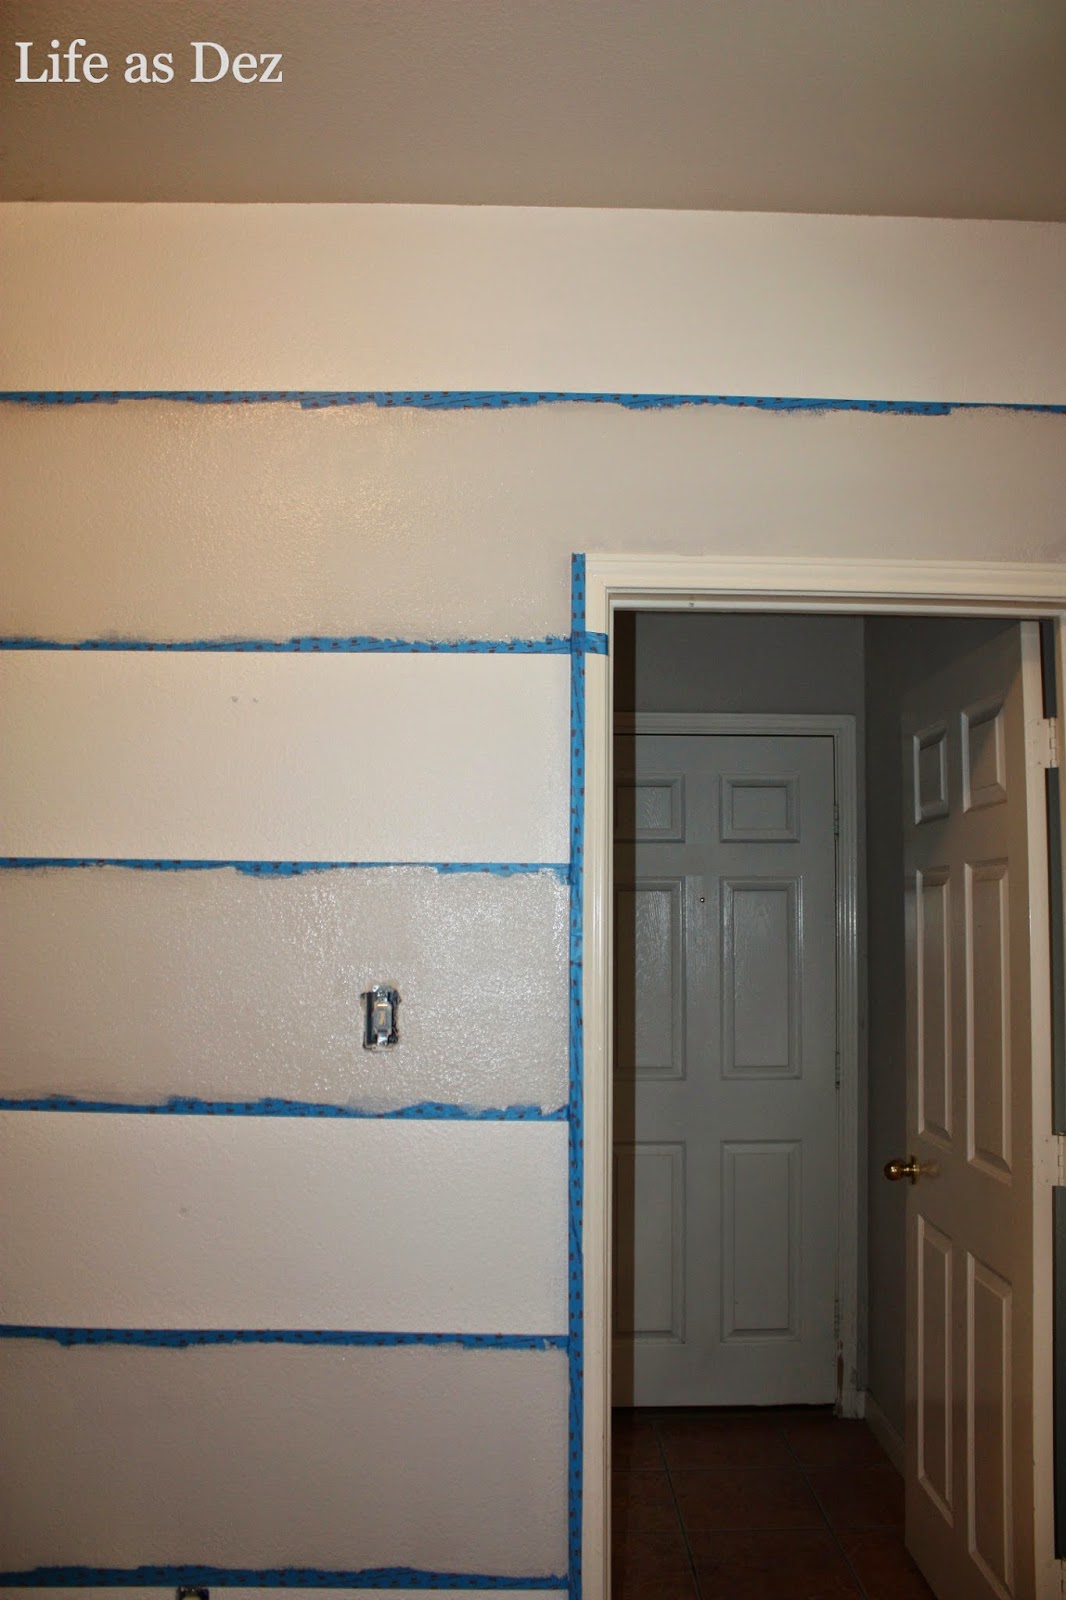
I was getting really thrown off on this step, because I am terrible at math... But we quickly figured it out and understood what to do. Measure your wall from the ceiling (or crown molding if you have it) to the top of the baseboard. Our wall measured at 105 inches. I wanted 7 wider stripes so we divided 105 x 7 and got exactly 15 in stripes. Start taping off from the very top. Make sure you have an odd number of stripes so that you begin and end with the same color. In our case we wanted white on the bottom and the top so that I didn't have to cut in a second time. You can use either a laser level or a chalk line. Whatever you have will work. We used a laser level and the Scotch Blue 1-1/2" W Delicate Masking Tape. Just to really secure the tape lines go over it with a credit card, a couple of times, just in case. ;) For the first stripe the tape went above the laser line so that our top stripe was exactly 15 inches and then after the first stripes tape you would measure from the bottom of the tape above to the top of the next and so on. I hope this makes since, I am confusing myself by typing it, so just make sure that EACH stripe is exactly 15 inches. Keep double checking throughout!!!

A good tip is to mark all of the rows that you are painting with a small piece of tape and then just tear it off as you go, that way you don't mistakenly paint the wrong section.


Third Step: Paint

So now is the fun part, we used a variety of our large roller, small 6 inch roller and a paint brush. As  always my hubby rolled and I cut in on the edges. You will most likely need to do between two and three coats. We only needed to do two coats and as soon as my hubby finished the second coat I would go behind him and tear the tape off at a diagonal away from the painted section. It was pure delight to see that tape rip off with straight lines!


Yay. Be brave and try it if you are anything like me. You will LOVE the outcome!


Friday, July 11, 2014

BEST NO BAKE COOKIES

Last night my hubby and I were really craving something sweet, but I had literally NOTHING sweet on hand.... Whats a girl to do in this predicament?? We went in the kitchen to see what we could throw together for some no bake cookies. I found THIS recipe and did some revising and this is what we came up with. HOLY DELICIOUSNESS!! Stop what you are doing right now and go make some... right now!


QUICK AND EASY NO BAKE COOKIES

  • 1 3/4 cup white sugar (I will use less next time since I also added coconut, white chocolate chips and milk chocolate chips)
  • 1/2 cup milk
  • 1/2 cup butter
  • 3 tablespoons nesquik powdered chocolate milk
  • 1/2 tablespoon PB2 chocolate
  • 1/2 cup creamy peanut butter
  • 3 cups quick cooking oats
  • 1 teaspoon vanilla extract
  • Coconut flakes (however much you want)
  • Handful of milk chocolate chips
  • Handful of white chocolate chips
Directions:
In a medium saucepan, combine the sugar, milk, butter, nesquik powdered chocolate milk, and pb2 chocolate. Bring to a boil and cook for about 1 1/2 minutes. Remove from heat, and stir in peanut butter, oats, vanilla, coconut flakes, chocolate chips, and white chocolate chips. Drop by teaspoonfuls onto wax paper. Let cool in the fridge until hardened or if you are to impatient, just have a couple of bites before then. Enjoy!

You could also make these festive for Halloween, Christmas, Valentines day, etc., by adding in colorful holiday m&ms or reeces and sprinkles!


Wednesday, July 9, 2014

My 4th of July weekend

This year for the 4th of July we didn't do too much. We barbecued with my best friend and her boyfriend on Friday and went to the park to enjoy some fireworks. I was feeling really blessed this 4th of July that we even have the opportunity to celebrate this holiday. A hometown hero, Thomas Spitzer, was killed in action in Afghanistan late June and he was flown home on the 4th of July, where they drove him from our towns small airport to the funeral home. It was such an amazing thing to see our town come together to show their support. People lined the streets of the procession all the way from the airport to the funeral home. Thanks to him and all of the other men and women that have served or are serving to allow us our freedom. 
I made some festive rice crispy treats. YUM

We also went swimming on Friday, in between bbq and fireworks. I kind of love our town during summer, except it is FILLED with tourist.


 Then when we got back home late friday night, we sat in our backyard and enjoyed some more fireworks.


4th of July isn't the same without our sweet guy. He is visiting his mom for the summer and will be home early August. Can't wait to see him!! 

01 09 10